This is just an update, as I postponed this project further until life started to take off in other areas. I am still planning to create the whole suit, but needed to make profit first with my own product.
So, I have been working on a consumer electronic prototype. I patented this product design and I am finalizing design and fabrication before we can find investors! This way I have funding to make this suit entirely and in much better materials. I also have been improving my CAD design capabilities, learning programming, and making great connections in industry. I have learned so much in the manufacturing industry, started a company, work two jobs, and have freelance clients all the time.
Things are busy, but progress is sure!
Find me on Linkedin!
https://www.linkedin.com/in/jdchristianson/
Friday, March 16, 2018

Monday, December 21, 2015
Working on coding and a few other things!
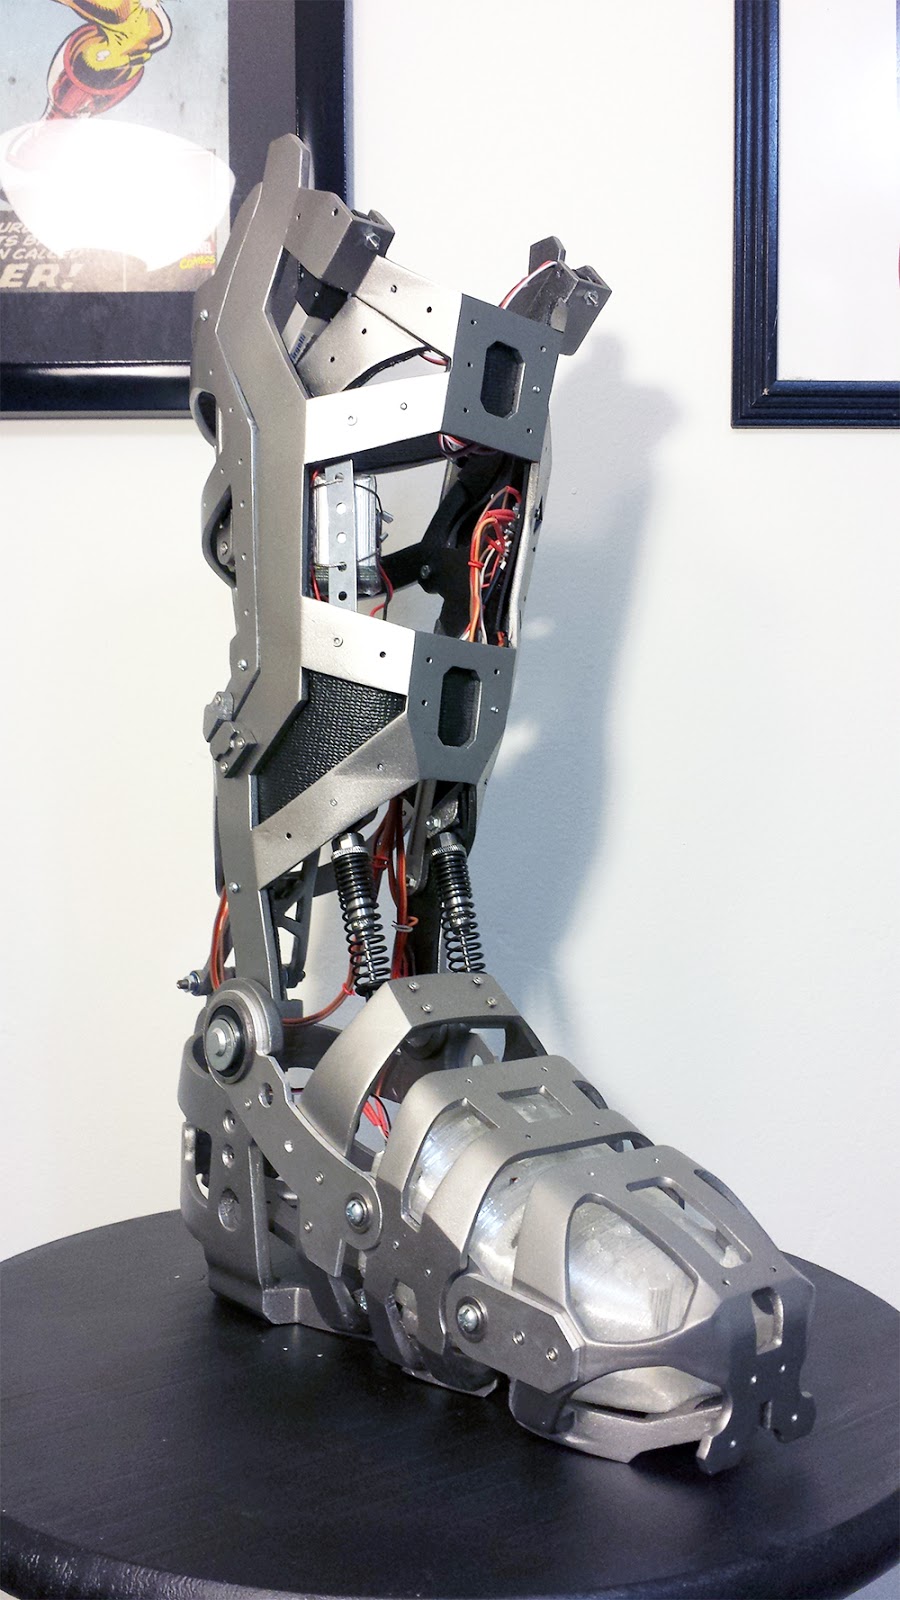
I had this all made last month, its just been a busy season at work with other projects! Here are some pics anyways as I hope to complete the extra added features with their coding this next month!



Thursday, October 29, 2015
It has been a very busy month with my job, but I have made some great preparations for this weekend's Comikaze event! We will be at the Vocademy booth (the largest one) which is where I work teaching 3D CAD and 3D printing. Here are some updates, where I am making final housings for shocks and electronics in the newer shoe prototype. Also, I built a large 2x3' light box display with Acrylic, DIY LED panels, and roadbox top/ bottom from my own original design from scratch.


Sunday, September 13, 2015

Monday, September 7, 2015


I have been sanding and painting on the new custom skeletal armor design! One great coater before primer on 3D prints is called XTC. It works good to fill in all the printed lines on the plastic first. Also the renderings are pics from the CAD model of the foot designed in Fusion 360. The blue pieces are actually waterjet cut pieces of Aluminum that overlap at each joint along the sides.
Friday, September 4, 2015


Monday, July 20, 2015
Saturday, June 27, 2015
Since March this year I have been designing, 3D modeling, and collecting all the parts necessary for the boot V3! Here are a couple videos of electronics testing, but I won't be releasing the printed and assembled V3 until it is closer to completion with all the integrated electronics. It's really looking and functioning great so far thought!
Wednesday, February 11, 2015
MK 42 Iron Man Boot V2 painted!

I finished painting the MK 42 Boot v2 last week, and here are several shots of the boot at different angles and the step forward!
Tuesday, January 20, 2015
It has been a year since I have posted because the project was on hold. I was working a new job in 2014 in a whole new location, without a garage at my apartment. Well, I have new designs for the boot and decided to paint the V2! I will be sanding and priming for a while today, then painting soon. I also purchased some clear coat to really make it look good if the paint job turns out well.


Monday, November 18, 2013
Wednesday, October 23, 2013
Well, today I had a couple hours to work on the interior skeletal system of the boot some. I hope to pick up the pace! Here you can see what is inside the shin that will be aluminum for the prototype. just above the boot, this bone system connects into under the knee. I have been doing drawings of the mechanics for the boot for the past month, but won't be posting those draftings so the 3D work is what you will see.
 |
| The shin plate, skeletal, my leg and the calf. There is more to add and some arms and articulation for the linear actuator. My leg definitely has more calf to it than what is here I think, but the other proportions are really close. |
 |
| Adding a gasket and configuring the ankle joint here. |
Thursday, October 17, 2013
It has been a while since an update. Alot of projects are going on right now for me but we are doing research and software work. I also need to save money for the main mechanical/ electrical items for the next phase of the project. Until the boot and interior skeletal within it are finished I won't be moving towards the magazine article and fund raising for the project. More 3D modeling is going on, but I will make some nice renders soon with the inner workings and what will be CNC aluminum.
Later!
Later!
Thursday, October 3, 2013
The past few weeks have been super busy with working in NY and two other jobs. The team has been meeting and discussing/ planning various components in the suit. Its really exciting to envision some of the newer mechatronics components.
I just made this comparison for armor scaling as it relates to a full body scan that I have of myself. This shows how Marvel really pushes the 7 plus heads high hero standards. Who in the world could have such a small head? They would have to be eight feet tall or something! Here you can see what an actual suit proportion would be for someone with a medium sized head and standing at 6' 1' with a thin frame (me).
 |
| The MK 42 suit on the left and my body scan model on the right. |
 |
| I took the helmet, torso, arms, and legs separately and scaled them to fit over this profile. |
 |
| Here is the side by side from the movie to real life. The legs may even be thicker but this is pretty close to what it would look like as an armor suit scaled to my body. |
Monday, September 16, 2013
Here is how the mechanism looks and how it works so far!

 |
| As you can see, we had only enough time after soldering the final wires to the board to tape it into position for demonstration. I will just create a housing for the electronics sometime next week after getting back from NY. |
For right now, there is only one lock set on the left side of the calf as you see here. However, with both sides locked there won't be any play when force is applied pulling apart. Awesome work so far from our computer and electronics engineers on the team! :)
Sunday, September 15, 2013
Well, we were able to successfully display at the Mini Maker Faire on Saturday! The lock mechanism was soldered just in time and it worked to demonstrate an auto locking function. Here are some pics from the start of that day. Five of the eight of us showed up for the event, which was good because we had to address the huge amount of people coming to ask questions. Kevin also showed up later on (who is working on programming a voice command "e-butler" system). I will take some more pics of the finished boot tomorrow, as I had no time to do so this past week in cramming in prints and assembly.


 |
| Setup time at the little 10x10 booth. |


 |
| Matt and his girlfriend programming the gauntlet control for display. |

 |
| I demonstrated the locking and movement of the boot all day, so my arms got red sun burnt! |

 |
| I let kids try on the V1 boot and walk around in it. They were so excited! |


 |
| The team, (minus Kevin who showed up later). |
Monday, September 9, 2013

Saturday, September 7, 2013


Earlier today I was able to sand and weld the calf together (looks somewhat rough from slurry). Tonight I decided to just try out the calf adhered to the shin with the dampeners installed. It works great! I have yet to CNC the slider arms for the calf and still have to get the complete circuit for the lock, which I also completed the pin and housing for earlier today.


 |
| Taking a full step with articulation! |

 |
| Here are the installed dampeners which give a much more rigid motion to the shin. |
Friday, September 6, 2013
Subscribe to:
Posts (Atom)